

Active Member
|
[China]

Address: No. 879, Ganghua Road, Hongguang Town, Pidu District, Chengdu
Contact name:admin

Chengdu Wanggan Technology Co., Ltd. |
|
|
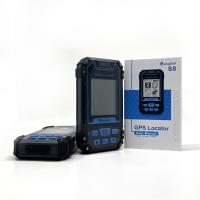
GNSS GPS Outdoor Agriculture Geography Land Survey Machine Location Finder GNSS GPS Survey Equipment
GPS Machine Interface Display:

Technical Parameter Of GNSS GPS Survey Equipment:
| Receiver Chip | High Sensitivity GNSS Receiver Chip | ||
| Receiver Antenna | Taimeng Passive Large - Size flat plate antenna | ||
| Positional Time | Hot Start Time: one Second; Cold Start Time: 30 Seconds | ||
| Positional Accuracy | Within 2 Meters (HDOP Value Less Than 1.0) | ||
| area Accuracy | Measurement error is not more than 0.03 Mu (1-3 Mu), 2% (More Than 3 Mu) | ||
| Distance Accuracy | Within one Meter (When HDOP value is less than 1.0, measure the length of 100 meters) | ||
| Functional Characteristics | Coordinate Measurement, Route Edit, Track Record, Navigation Function, Altitude Measurement, Area Measurement, Distance Measurement, Lofting Function | ||
| Data Statistics | Area Statistics, Distance Statistics | ||
| Area Record | 99 pieces | Waypoint Record | 2000pieces |
| Distance Record | 99 pieces | Track Record | 100pieces |
| Route Record | Maximum Number Of Editions 200, Single Route Up To 400 Points | ||
| Track Display | The trajectory will be displayed in real time during the measurement process, and the past measurement figures can also be viewed in the statistical records. | ||
| Barometric Altimetry | About one meter (Barometer measurement, absolute altitude needs to be calibrated) About 10 Meters (GPS Measurement, HDOP value below 1.0) | ||
| HDOP Settings | User-Defined HDOP Setting | ||
| Display Screen | 2.4 Inch, outdoor high-definition black-and-white screen | ||
| Working Temperature | -20℃~65℃ | ||
| Storage Temperature | -40℃~75℃ | ||
| Device Size | 117mm*61mm*20mm | ||
| Device Weight | 120 G (Battery Free) | ||
| Data Interface | USB Interface, Which Can Be Charged Through This Interface | ||
| Standard Configuration | Host*1, Lithium Battery*1, Charger*1, Data Cable*1, Lanyard*1, Manual*1, Warranty Card*1, Package*1 | ||
Measurement Function Of GNSS GPS Survey Equipment:
1.The Acquisition Function of Waypoint (Current Position)
Press the [▲][▼] button to select the “waypoint” and then press the [Start /Stop] button to enter the acquisition interface.You can see the current location information, confirm that you want to collect the current location, and press the [Enter] button to save.
2.The Entry Function of Waypoint (Recording a waypoint with known latitude and longitude)
Press the [Setting] button to enter the setting interface.Then choose "Waypoint"to enter, select "Establish" , according to the specific latitude and longitude information of the known waypoint, press [Enter] to switch the item to be changed, and press the [▲] [▼] button to change the specific value.After the change is completed, press the [Enter] button continuously. When the input box moves out of the last option, the entered information will be saved.
3.The Navigation And Viewing Function of Waypoint
Press the [Setting] button to enter the setting interface.Then choose "Waypoint"to enter.Next select "Check Waypoint " and enter.Choose the waypoint that you want to navigate, and then press the [Enter] button to view the specific information of the selected waypoint.
After confirming the navigation information, press the [Start/ Stop] button to start navigate,and you can delete the waypoint information by double-pressing the [Enter] button.
During navigation, the pointer points to the navigation point. When the navigation point is reached, the bottom of the screen will show the destination. And press the button to exit navigation.
4.The New create Function of Route (Combining Existing Points into Routes)
Press the [Setting] button to enter the setting interface.Then choose "Route"to enter.Select "Establish " and enter. After entering, press the [▲][▼] button and [Enter] button to select the waypoints that need to form a route.
((The order of the points on the route is based on the order in which the waypoints are saved)
After the selection is completed, please press the [Start /Stop] button to save the newly created route.
5.The Viewing Function of Route
Press the [Setting] button to enter the setting interface.Then choose "Route"to enter.Select "Check Route" and enter. After entering, press [▲] [▼] to select the route you want to check , and then press the [Enter] button to view the specific information of the selected route.
If the route needs to be deleted, please double-press [Start /Stop] to delete the route information.
6.The Navigation Function of Route (Navigate To the Route)
Press the [Setting] button to enter the setting interface.Then choose "Route"to enter.Select "Check Route" and enter. After entering, press [▲] [▼] to select the route you want to check , and then press the [Enter] button to view the specific information of the selected route.
After confirming the navigation information, press the [Start/ Stop] button to start navigation.
During navigation, the pointer points to the direction of the current position to the nearest point of the track, and only needs to travel in the direction of the pointer to reach the nearest position of the route.Please press the button to exit navigation.
7.The New Create and Management Function of Lofting
The lofting matches the route. New routes mean new lofting, and deleting routes means deleting lofting. So if you need to build new lofting points, you can build new routes, please refer to the method: New Route Function.
8.The Navigation Function of Lofting (Point-by-Point Navigation of Lofting Points)
Press the [Setting] button to enter the setting interface.Then choose "Route"to enter.Select "Lofting Edit" and enter.
Please press the [▲][▼] button to move to "Route",and press the [Enter] button to enter.
Please Select "lofting Edit" and enter. After entering, press the [▲][▼] button to select the lofting route you need to navigate, and then press the [Enter] button to view the specific information of the selected route.
After confirming the navigation information, press the [Start/ Stop] button to start navigation.
During the navigation process, the pointer points to the navigation direction. When navigating to the lofting point, press the [Enter] button, then the navigation points to the next lofting point, and press thebutton to exit navigation.
(When navigating to the lofting points one by one, the locator will display "Arrival Start Point", "Arrival Sample Point" and "Arrival End Point" in order)
9.Equal Distance Lofting And Equal Division Lofting Creation
By setting the number of lofting points or the distance between lofting points to achieve equal or equidistant.In the home screen of the device, press the [Setting] button to enter the setting interface.
Please press the [▲][▼] button to move to "Route",and press the [Enter] button to enter.
After entering the interface of "Route", select to enter "Establish ", select the starting point and end point of the lofting, and press the [Start/ Stop] button to establish a new route.
Then select "Lofting Edit" and enter, select the newly established route, press the [Enter] button to enter.
Equal Division Lofting, please press the [Enter] button to edit, and then use the [▲][▼] and [Enter] buttons to set the number of lofting points.
Equal Distance Lofting, please press the [Enter] button to edit, and then use the [▲][▼] and [Enter] buttons to set the equidistance distance.
After the point setting is completed, press the [Start/ Stop] button to create an equal distance lofting. After the creation is completed, press the [Enter] button to save.
10.The Lofting Creation Function of User-Defined Distance
Customize the distance of the lofting points as needed
The basic operation steps are same as the first four steps of the "Equal Distance Lofting ".
After entering "Lofting Edit ", press the [Enter] button to select "Custom ", press the [Enter] button to enter, then press the [▲][▼] button and the [Enter] button to set the distance of the single segment, press the [Start /Stop ] button to create the distance, and then follow the above method, continue to set the spacing between other lofting points.
After the setting is completed, press the [Start /Stop] button to create an equal distance lofting. After the creation is completed, press the [Enter] button to save.
11.The Usage and Opening Function of Track
After the track function is turned on, the locator records your measurement track while measuring the area and distance.
In the home screen of the device, press the [Setting] button to enter the setting interface.
Please press the [▲][▼] button to move to "Track",and press the [Enter] button to enter.
After entering, in the track measurement option, press the [Enter] button to switch the track measurement on or off.
12.The Navigation and Viewing function of Track
In the home screen of the device, press the [Setting] button to enter the setting interface.
Please press the [▲][▼] button to move to "Track",and press the [Enter] button to enter.
Then select "Check the Track" and enter. After entering, press the [▲] [▼] button to select the track you want to navigate, and then press [Enter] to view the specific information of the selected track.
After confirming the navigation information, press the [Start /Stop] button to start navigate, and you can double-press the [Enter] button to delete the track information.
During the navigation process, the pointer points to the direction where the current position reaches the nearest point of the track..Please press the button to exit navigating.


