

Active Member
|
[China]

Address: Room 113, No.159, ShuiNan Road, Fenkou Town,Chun'An County,HZ,CN
Contact name:Darren

Hangzhou Yobang import and Export Co., Ltd. |

|
|
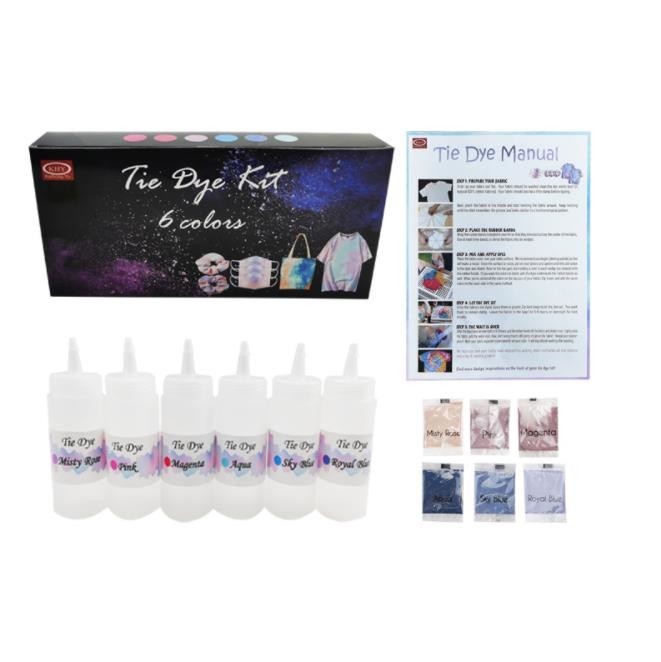
Large Tie Dye Kit for Kids and Adults 239 Pack Permanent Tie Dye Kits for Clothing Craft Fabric Textile Party Group
| Name: | Tie dye DIY products |
| Function: | Cloth, Cups, Shoes, Face mask, etc |
| OEM: | YES |
| Location: | CHINA |
DETAILS:
Learning how to tie dye t-shirts with things in your household is not only a fun craft and activity to get stuck into over the weekend but it’s also a great way to re-use old clothes and turn them into something you’d wear again.
Tie dyeing t-shirts is one of those crafty fashion trends that always come back into style every couple of years. The versatility of the print and the many ways that you can tie dye t-shirts yourself makes it an appealing craft project for beginners as well.
We’ve created this step-by-step guide to help you create your own
unique tie dye patterns on t-shirts, but the same techniques can be
used on all sorts of fabrics and clothes. From socks to jeans, old
white shirts and all sorts of home furnishings like cushion covers
or dip dye napkins.
How to tie dye t-shirts
To tie dye t-shirts, you will need:
Elastic bands or string – we’ve used string throughout as we had
some already but elastic bands are great for speed
Pre-washed and still damp t-shirts (or another item you wish to
dye)
Rubber gloves
Fabric dyes, we’ve used a range of Dylon fabric hand dyes in
Paradise Blue, Passion Pink, Ocean Blue, Sunflower Yellow, Tropical
Green, Tulip Red and Peony Pink
Old bottles or cartons with caps or spray attachments (plastic
drinks bottles work best)
Warm water
Salt
Large and deep dishes or trays for dyeing
And these added extras will help to create even more unusual
designs with your tie dye:
Cling film
Microwave
Air or water-erasable pen
Ruler
Ice
Cooling rack
Preparing to tie dye t-shirts
Begin by mixing up the powdered dyes with warm water and salt,
following the manufacturer’s instructions for the measurements. We
made up 500ml in each dye colour.
Pour the dye mixtures into the clean bottles or cartons. Top with a
spray attachment or use a push pin to create a hole in the top of
the old cap to squirt the dye through.
Make sure the fabric or item for dyeing has been washed and is
still damp before you begin dyeing.
Cover all your surfaces with a protective sheet or, better still,
take your dyeing outside on a sunny day for less-mess. Tie-dying,
with all its potential for mess, is a great outdoor craft!How to do
different tie dye patterns
There are loads of ways to create different patterns when
tie-dyeing, most methods use string or elastic bands to fold and
shape the fabric before applying the dye. Take a look at our
step-by-step instructions to create your own psychedelic designs or
bold patterns.
INFORMATION:
Tie-dye is a technique of coloring fabric that involves folding, twisting, and scrunching the fabric and then tying it tightly with string or rubber bands. Then, you dip the fabric in dye. The areas that are twisted and tied will receive little to no dye. Once you remove the ties, you will find unique patterns on the fabric based on the way it was manipulated and bound.
Tie-dyeing is a quick and easy project, and it's even great for
kids. However, it can be messy, so you should wear protective
clothing and cover your work space with newspapers or other items
for easy cleanup. You can tie-dye a wide variety of items,
including articles of clothing, sheets and pillowcases, curtains,
and more. Tie-dyed items can even make excellent customized gifts.
1. Prepare Your Item and Work Space
Before you dye your item, wash it to ensure that the fabric is
clean for best dye adherence. Then, if you wish, treat the item
with a dye enhancer following manufacturer's instructions.
Cover the area where you will be tie-dyeing, so splashes of dye don't accidentally stain anything. Put on your protective clothes.
2. Prepare the Dye
Prepare your dye as directed by the manufacturer. You can either
mix dye directly in a large pot or bucket, or you can mix it in a
plastic squeeze bottle for more targeted dye application. The
instructions on your dye will typically state which method is best.
3. Tie Your Item
Now it's time to twist and tie your item. You can choose to tie
parts of the fabric in an irregular manner or aim to form a
specific pattern.
For instance, to make a spiral pattern with the dye, lay out your fabric completely flat and find its center. Then, using a fork or your fingers, grab the center and swirl it until the fabric is rolled in a circular shape. Use your rubber bands or string to secure the fabric in this shape. The ties should meet in the middle of the fabric, forming an asterisk.
4. Start Dyeing
Now your item is ready for the dye. Either dip it in your dye
container or apply the dye from the squeeze bottle. Aim to fully
cover the fabric in dye.
If you are using multiple colors, it's usually best to start with the lightest one. Check your manufacturer instructions for how to proceed to the next color; you might have to rinse the fabric or pause for a period of drying time.
5. Wait and Rinse
Follow manufacturer instructions for how you should allow the dye
to set on your item. In many cases, you will have to wrap the item
in a plastic bag or plastic wrap for several hours.
Then, remove the ties from the fabric. Rinse it in warm water that you gradually turn to cool water. Stop rinsing once the water runs clear and you no longer see dye coming off any part of the fabric. Finally, hang your item to dry. Be aware it might still drip some dye, so protect the surface under where it's hanging.
FAQ:
Q: How should I submit artwork and what format?
A: You can submit artwork to us by Email or upload your artwork to our FTP.
We accept: COREL DRAW, ILLUSTRATOR, COREL PHOTO PAINT, PHOTOSHOP,
TIFF,. JPEG,. GIF (tiff at 300dpi, jpeg at 300dpi, gif at 600dpi 100%size)
PDF (vectors in PDF, if using raster program make sure you have high res at 100%size.)
Q: What are setup costs?
A: Set up costs most often apply to new graphics. The first time you order and have a two color print to it, we charge a one time
fee for two screen charges. If you are an existing customer and you want to a NEW graphic the same rules apply. Set up fee for
normal deck heat transfer graphic: USD160 unlimited colors. For longboard transferr graphic USD320 unlimited colors.
Q: Can I order samples?
A: Absolutely, we send requested samples at a minimum charge. You will have to pay shipping cost and samples fee,
the samples fee will return back to you after you place your order. New customers must email us the following information.
Company or shop name, Address, telephone No. specific boards.
Q:When is your delivery time?
A:It depends on product and order QTY.
Normally,it takes us 25 days after receiving the deposit,Repeat order only need 15-20 days.
Q: What is the loading port?
A: Regularlly Ningbo or Shanghai
Q: Do you provide OEM developing services?
A: Yes,we have plenty experience in OEM developing, aslo for famous brands,


