

Active Member
|
[China]

Address: 31E,ZHONGNAN GE,ZHONGYIN HUAYUAN,FUZHONG RD,FUTIAN,SHENZHEN,CHINA
Contact name:Vita

IRONMAN TECHNOLOGY CO., LTD |
|
|
Pre-installation Information
If the controller has not been removed from its shipping carton,
inspect the carton for
damage then remove the controller.
• Inspect the unit for any obvious shipping damage and report any
damage due to
transit to the carrier.
• Make sure a bag containing mounting hardware is included in the
carton with the
controller.
• Check that the model number shown on the inside of the case
agrees with what
you have ordered.
Model Number Interpretation
Write your controller’s model number in the spaces provided below
and circle the
corresponding items in each table. This information will also be
useful when you wire your
controller.
Mounting
Physical Considerations
The controller can be mounted on either a vertical or tilted panel
using the mounting
kit supplied. Adequate access space must be available at the back
of the panel for
installation and servicing activities.
• Overall dimensions and panel cutout requirements for mounting the
controller are
shown in Figure 2-2.
• The controller’s mounting enclosure must be grounded according to
CSA standard
C22.2 No. 0.4 or Factory Mutual Class No. 3820 paragraph 6.1.5.
• The front panel is moisture rated NEMA3 and IP55 rated and can be
easily
upgraded to NEMA4X and IP66.
Mounting Method
Before mounting the controller, refer to the nameplate on the
outside of the case and
make a note of the model number. It will help later when selecting
the proper wiring
configuration.
1 Mark and cut out the controller hole in the panel according to
the dimension
information in Figure 2-2.
2 Orient the case properly and slide it through the panel hole from
the front.
3 Remove the mounting kit from the shipping container and install
the kit as follows:
• For normal installation two mounting clips are required. Insert
the prongs of
the clips into the two holes in the top and bottom center of the
case
• For water-protected installation four mounting clips are
required. There are
two options of where to install the mounting clips:
1) Insert the prongs of the clips into the two holes on the left
and right side of the
top and bottom of the case or
2) on the center on each of the four sides.
• Tighten screws to 2 lb-inch (22 N•cm) to secure the case against
the panel.
CAUTION: Over tightening will cause distortion and the unit may not
seal properly.
4 For water-protected installation, install four screws with
washers into the four recessed
areas in the corners of the front bezel (Figure 2-3). Push the
point of the screw
through the center piercing the elastomeric material and then
tighten screws to 5 lb-in
(56 N•cm).
Ironman Technology Co.,LTD
Featured Brand:
● HONEYWELL ● AB ● OMRON ●SIEMENS ●SCHNEIDER
● ROSEMOUNT● ABB ● NOTIFIER ●MTL ● GE ●And many more !
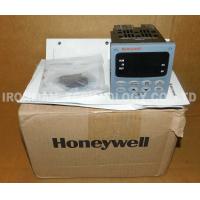
Honeywell UDC3200 Controller 3200-C0-000R-210-00000-E0-0 Universal Digital Controller
Lead time:3-5 days
New with one year warranty


